Posts

While the sun was shining I got in the garden and filmed a couple of workouts to share on my Facebook page.

2 speedy circuits, postnatal and pregnancy friendly (bar one exercise when you’re final trimester, and provided no SPD), one for the lower body and one for the upper.

They’re time-lapse ones, to keep it quick for the sake of social media, BUT I’ve written up the circuits in this blog, with real time video demos of the exercises linked, so you can try them at home. All you need is a resistance band, but they are inexpensive and so versatile it’s worth getting one.

Here’s the type I use (I haven’t actually got this one as I buy long rolls and cut them out as I get through so many, but with most brands medium is an appropriate strength, and 1.2 metres is long enough.)


Postnatal and Pregnancy Lower Body Workout

Banded Side Steps x 20 Use a mini band as in link here or you can use a long resistance band as I did in the time-lapse video. Stick your bum out in a mini squat position and take 20 steps, 10 in each direction. Works the butt and outer thighs.

Banded Squats with Pulse x 10 Inhale as you lower, exhale as you pulse and rise. The band adds extra resistance, the pulse is HARD, but if newly postnatal or very pregnant a squat without the band and pulse is better, as in the video here.

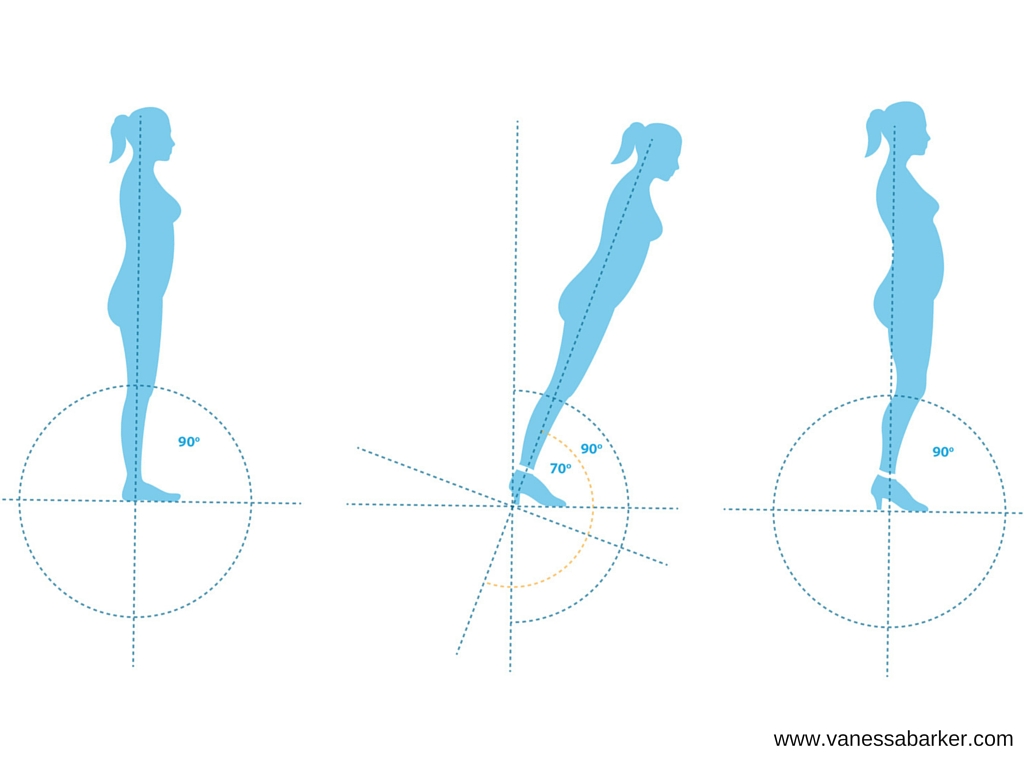
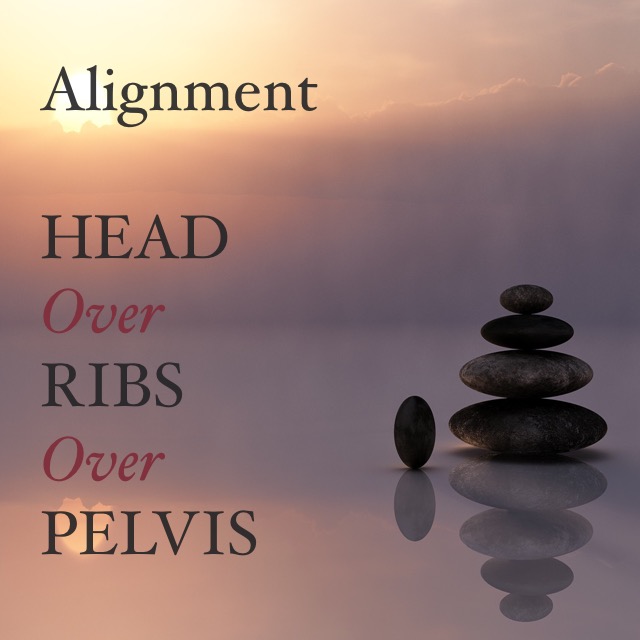
Deadlift with Band x 10 Keep ribs over pelvis throughout, inhale and push your bum back, exhale and rise, driving the action with your glutes.

Reverse Lunges x 20 Alternating. Inhale and step back, dropping down so your knees are at 90 degrees. Exhale and return to start.

Banded Leg Extensions x 10 each side Hands under shoulders, knees under hips. Wrap the band more glutes! No need for the band if you’re pregnant or newly postnatal (and is too much strain for a larger diastasis), and final trimester this will start to get too hard even without the band, so you can do it sliding your leg back whilst keeping your toe on the floor, then skip it completely.

Repeat circuit as needed!


Postnatal and Pregnancy Upper Body Workout

Pulldowns x 10 Sorry no video for this one, but detailed instructions: hold resistance band overhead. Exhale and bring your arms down to the side of your body with a 90 degree bend at the elbows, with the band behind your back. Inhale and return. Engage core to keep ribs down (rather than let them flare out). Good for the back and shoulder and chest mobility.

Chest Press x 10 Exhale as you straighten the arms, inhale as you bend them. Aim to bend the elbows to 90 degrees, forearms parallel. Works chest, triceps and shoulders.

Open the Door x 10 Exhale as you open your arms up, inhale as you return. Works deep shoulder muscles and opens shoulders, good for posture.

Pull Aparts x 10 Keep ribs down as you exhale and pull the band apart. Keep shoulders relaxed, slide shoulder blades together. Great for the back, shoulders and posture.

Bent Over Row 10 Keep a neutral spine‐ this means not letting your back bend forwards. Bicep Curls 10 No video but very simple! Stand on the band with arms straight and exhale as you bend your arms.

Overhead Tricep Extension x 10 each side Keep your ribs over pelvis‐ there’s a temptation to let your back arch here! Exhale as you straighten your arm.
Repeat circuit as needed!


These are pregnancy and postnatal Safe, BUT Stop anything that causes pain, and book into see a Women’s Health Physio‐ many do packages with a pregnancy and postnatal appointment. All exercise carries a risk of injury, so consult your doctor before starting anything new

“What’s the best exercise for toning my tummy?”

I probably get asked this question more than any other. Which is understandable- I remember how weak I felt in the months after giving birth, and looking down at a tummy that didn’t look like mine anymore!

Your postnatal core isn’t the same as your pre-pregnancy core. For a start it’s about 10x more amazing because it’s just grown a baby. So let’s give it the love it deserves!

Which means not rushing things for a start. The pressure to ‘bounce’ back can be immense, and I don’t just mean physically. Emotionally it takes time too, to adapt to your new role as mummy, yet new mums are up and about so quickly.

And this can affect how well you core recovers. Nutrition, rest, stress, all of this helps early healing. Check out how new mums get treated in some cultures!

But when you are ready to start exercising it can feel like there’s a huge list of what not to do, and not much guidance on what you can do! The go-to exercises for ab toning, like crunches, are no good, and running shouldn’t be rushed.

There are SO many fantastic exercises you CAN do though! Here are 5 here to get you started.


Just remember that these are for progressively strengthening your core. I always work on breathing technique with postnatal clients before any exercises- it’s vital you get this right to get the most from them, especially if you have diastasis recti.

And when it comes to that postnatal bulge, it could be a case of weakened muscles that need gradually strengthening, but if there’s a layer of fat on top then you’ll need to look at your nutrition, and I always recommend walking for postnatal clients too (it’s massively underrated).

1. Heel Slides

These are great for the early postnatal period when you’re just returning to exercise. It’s about finding and connecting to your deep core muscles, (not your abs) as you stabilise your pelvis while applying a very gentle load to your core. Building this base is the first step towards a more toned tummy.

There are a few variations on this exercise, and for some clients, including those with a larger diastasis, I give a slightly different version to this where you keep your heel on the floor and exhale through the entire exercise, however for most of my postnatal clients this is the one we start with.

2. Bridge

Love this one! For many ‘core’ means ‘abs’ or six pack, but the core, as well as including muscles much deeper than the abs, is about all the muscles around it too, and how well they function as a team.

So here we’re hitting the low back AND the butt, which work together. Plus, if you nail the breathing you’ve got the deep core involved too.

Again there are variations, but here I’ve added a ‘squeeze’ with a pilates ball to give the pelvic floor some extra work.

3. Straight Arm Pulldown

Love this one too! Since we spend the vast majority of our days upright, it makes sense to do some exercises that way! This is another one that I use in the early postnatal period for connecting to the deep core muscles and perfect for moving from the mat to standing work. It applies a gentle load to the core, which means enough to stimulate tissue regeneration and help heal diastasis without overdoing it and making it worse.

Really try to focus on the exhale, and getting a good 360 expansion (read this blog if that doesn’t make sense) on the inhale. Alignment is really important too- ribs over pelvis, no arching the back or thrusting your hips forwards here!

4. Half-Kneeling Push

So this is a fantastic exercise when it comes to getting ‘bang for your buck’. When you’re short on time (as most mums are!) this works the core and the chest, triceps and the split stance engages your legs and butt as they stabilise your pelvis.

With your shoulders relaxed, and wrist, elbow and shoulder level, your push forwards and exhale. The pressure of the band pulling you backwards engages your core, and you can add a twist which mimics how we tend to actually use our core: pushing a door open, playing tennis or boxing for example, we twist.

I wouldn’t start with the twist, but build to it. However this can be adapted to suit nearly any level, by adjusting the resistance from the band. You can keep it incredibly light so as not to create too much pressure (which we don’t want when you first return to exercise after baby) and focus on the deep core connection, then build to a much stronger band to really tighten the muscles around your waist.

5. Birddog

This is such an amazing core exercise (when done properly). It works your entire torso and pelvis as you use your butt when you straighten your legs AND your upper back and shoulders to stabilise your arm and shoulder blade!

PLUS the ability to co-ordinate your opposite arm and leg (like when you walk or run) is a really important movement pattern. There’s a reason we learn to crawl before we walk- it develops the necessary co-ordination, stability and strength. So this is becoming quite a trendy exercise- check out this Washington Post article about how crawling is the new plank!

Unfortunately I see this done badly a LOT. Remember to keep it SLOW and straighten your leg from your hip using your butt muscles, NOT arching your lower back (although yeah I’m sure it does look more sexy in an Insta post). Also try to avoid shifting your weight side to side too much. This gets easier with practise as it requires using your core more, but the pole on my back in the video is to demonstrate alignment and gives me feedback so I can feel any weight shift or postural changes.

This really is deceptively hard though and NOT one I use on clients with a very large or soft diastasis- the pulldowns, bridges and heel slides are a better place to start, then progress to this.

For more advice download my 10 Tips for getting back in shape after having a baby.

Disclaimer: consult with a medical professional before making any changes to your exercise routine, especially if you haven’t done any restorative postnatal work- be sensible about what you attempt! See full disclaimer here. If you’re unsure whether any of these are suitable then please see a postnatal qualified instructor or a Women’s Health Physio, or comment below and I’ll do my best to help.


1

I’ll cut to the chase: most of us suck at walking.

In her book Move Your DNA Katy Bowman describes walking as “controlled falling”, in that most of us simply fall from one foot to the next, rather than focusing on using our butt muscles to drive us forwards.

I’ve written about the benefits of walking, and more importantly how much we should be aiming to do, but now it’s time to make sure you get maximum ‘bang for your buck’ from your walks.

Here are some simple stretches, exercises and changes you can make to your walking technique to ensure you’re actually using your glutes when you’re out and about!

Release Tight Hips

Too much time sitting means tight hips. When we sit our legs are lifted in front of us, and these muscles at the front of the hips can get tight. This means when we walk and we want our legs pushing off behind us, the tightness at the front can restrict that.

Here’s a simple test to see if you have enough mobility for your bum to effectively pull your leg back.

Lie face down on the floor. When your pelvis is neutral (which is where it should be) then your pubic bone and the two most prominent, forward boney points on the side of each pelvis should all be level. So when you lie down you should feel an equal pressure on all 3 points.

You should feel your pubic bone pressing into the floor, and if you look down from where it's labelled 'iliac crest' to where it ends, you should feel the 2 bony points on either side there too.

You should feel your pubic bone pressing into the floor, and if you look down from where it’s labelled ‘iliac crest’ to where it ends, you should feel the 2 bony points on either side there too.

Keep your head down, and lift one leg off the floor, using your glute muscles. How high can you lift your leg? Does the pressure on these 3 boney points remain the same or does your pubic bone lift up? Do you have to work your stomach muscles to keep it down?

Ideally you want to be able to lift your leg behind your body without having to work to keep your pelvis level. If you do, then when you walk you’re likely to compensate for this tightness by arching the lower back instead.

Stretch your hip as in the video below. Make sure you keep a neutral pelvis- squeeze your glute to almost tuck your bum under, and make sure you stay upright, rather than leaning forward. Raising your arm to bend slightly takes the stretch a little deeper. Hold for 30 seconds, or until the stretch eases off.

Strengthen Your Glutes

Follow this with some exercises to strengthen your glutes. This blog includes some simple exercises to help build strength for running, and they are equally useful for walking.

Go Minimal!

Your choice of footwear has a huge impact on how you walk. As this picture shows even a small heel can alter your whole body’s alignment. This means joints getting more wear and tear and muscles not working at their best.

heels walking alignment

So a flat shoe is advisable, with a flexible sole because reduced foot movement will also affect how your muscles are loaded. However if you’re used to wearing more supportive shoes please transition slowly, to give your muscles time to adapt; the book Whole Body Barefoot is all about transitioning to minimalist footwear. And if you wear orthotics or have any joint problems please consult your physio/ osteopath/ chiropractor for advice.

Vary Your Terrain

So much of our walking is on flat artificial surfaces. Including a variety of gradients in your walk challenges your muscles in different ways. For example walking uphill requires more flexibility in your calf muscles, and works your glutes more, and the variety means less repetitive strain on your body.

Uneven terrain is good too, especially if you’re in minimal shoes. Walking over lumps and bumps is good for the feet and more challenging to the body than a flat surface, meaning a better workout!

barefoot walking

Uneven terrain and barefoot- mega workout for her legs here!

Get off the treadmill

When you’re on a treadmill the belt carries your foot back for you, reducing the work for your butt muscles and increasing the work for the muscles at the front of your hip, which have to pull your leg forwards. This is the opposite of what we want, especially if you’ve spent too much time sitting at a desk or in a car!

If you do have to use a treadmill, make sure it is on an incline of at least 1%, to force you to push off a little and challenge the glutes.

And regardless of where you are, try to walk through the whole foot with a smooth rolling movement. Keep your head over your shoulders, rather than projecting it forwards (or looking down at a phone), and your arms should have a smooth swing, pushing back more than forwards.

For more specific exercises to help improve your flexibility, strength and posture, find out more about personal training.

1
81

Probably not. Most of us don’t. Cars, the convenience of online shopping, the weather, it all means we don’t get as much time walking as we should.

Yes, walking. What did you think I was talking about? Ok I’m sorry, but it’s not easy making a blog on walking sound exciting.

walking benefits for the pelvic floor and postnatal

Because most people don’t think of walking as exciting.

It’s not a sexy form of exercise. You don’t see people boasting about their walking personal best like a runner does, or the killer spin/ Insanity/ whatever class is on trend and torturing you right now. (Sorry, I shouldn’t say that, I used to teach indoor cycling and don’t really consider it torture. Not once you’ve got used to the seats at least.)

But walking is the most underrated form of exercise.

And we really don’t get enough. One study found 80% of adults didn’t even manage to take moderate exercise 3 times a week, and just 25 minutes of brisk walking a day can add up to seven years to your life.  (ok, this is getting a bit boring now; no more health stats).

Walking is a fundamental movement of the human body.

As well as not doing enough of it, a lot of what we do is poor quality walking (I’ll talk more about this in my next blog), and it has so many benefits. I cannot emphasise enough how awesome walking is.

Walking works your pelvic floor

The pelvic floor loves movement; a sedentary lifestyle is one of the worst things for it. Watch this to see how regular walking engages your pelvic floor:

It gets those glutes working!

Too much sitting results in weak, ineffective butt muscles. Walking is a great way to strengthen them. Walk, and walk often, making sure they’re engaging properly. Make sure you’re pushing back with them, not just flopping forward from one leg to another. Have a feel- place your hands on your buttocks and see if you can feel them tense up as you land on each leg (don’t worry, this won’t look weird at all), then try and drive your eg back and use them to push yourself forwards.

Walk your way to more vitamin D

Not all walking is created equal, and walking on a treadmill is NOT the same as getting outdoors (more on this in the next blog). And when you’re outside, you get your daily dose of vitamin D. A LOT of adults are deficient in this, and interestingly it’s been linked to pelvic floor dysfunction, so yet another benefit to your pelvic floor!

Walking is fantastic postnatal exercise

It has none of the risks that some exercises (such as running) carry for vulnerable joints and pelvic floor muscles, when done properly uses a huge number of muscles, and it is one of the few exercises that is easily done with baby. In fact it’s great for babies to get outside, and increased sunlight has been linked to better night time sleep for them!

Add to that reduced stress, especially in natural settings, the chance to think (or not think if you need a bit of mindfulness), the benefits to the glutes and pelvic floor- this is why daily walking is part of the homework for mums on Restore My Core.

It’s easy to fit in

It’s so easy to spend your day rushing around and busy, but never really moving. A lot of people struggle to find the time to go to the gym or follow a more structured exercise routine, but it’s so easy to fit in some walks. Because walking serves a purpose: getting from A to B. Even if it’s just parking a bit further from your destination, start to build a bit more ambulation into your day.

How much do you need?

This depends on a bit on how much you’re getting now (I feel like I should be able to slip some puns in here). As with any exercise, build up slowly. But looking at how much our ancestors walked is a good guide to what we should be capable of.

In her book Move Your DNA, Katy Bowman says anthropolgists estimate hunter-gatherers walked about 1,000 miles a year. That’s 2.75 miles a day. BUT, this mileage wouldn’t have been broken down that neatly. There would be short walks spread throughout the day, along with days of very little walking and days with much longer walks.

The odd longer (10 mile) walk means you develop the strength and endurance in your muscles. The regular short walks mean you benefit from regular boosted circulation (‘feeding’ your cells and removing waste products) and regular breaks from too much sitting and all the negative adaptations that can bring.

10 miles might seem intimidating.

But how about signing up to an event like our local Starlight Walk? It’s 13 miles, but you’re raising money for a good cause, and there’s plenty of motivation and entertainment on the night. Something fun to aim for is the perfect excue to get started!

Next time I’m going to tell you how to pimp your walk (yep, still trying to make it sexy) and get the most from your daily amble. Because a lot of people are doing it wrong.

Not all walking is created equal, but with a few tweaks to your route, and the right stretches and exercises, you can make sure you maximise the benefits next time you head out for a stroll. Sign up for updates here to make sure you don’t miss it (and grab a couple of freebies while you’re at it).

81
1

So, you’re ready to get started. You’ve read my last blog about how long you should wait before running after baby, and it’s time to run.

Running is a great form of exercise- it’s free, and anyone can do it, anywhere. But it’s an advanced exercise. Your feet will hit the floor about 1500 times per mile: that’s your body weight plus the extra g-force, and if you’re carrying any extra pounds then that’s pretty intense.

I can’t remember where I heard this (I definitely stole it from somewhere!), but it’s so true:

training running

So Let’s Make Sure You’re Ready!

I don’t just mean make sure you’ve recovered from giving birth. I mean let’s get your body ready to cope with the stress, and get better results when you do run. Here are 5 tips to get you ready.

1. Incline Walks.

I know, I know. You want to work. Really feel like you’ve built up a sweat, get that kick that only running gives. And you will. Seriously. Hiking up a steep hill is hard work, and it’s perfect for preparing to run.

More so than walking on a flat surface, a good hill will get you using your arms and rotating your body, just like you do when you run. This will help your running technique. It requires loading and control on one leg, like running, but without the impact. And all this means you’re integrating your core and building the strength needed to run.

So if you haven’t yet, spend some time doing hill hikes before you start the running regime.

2. Build Your Butt!

The bum, or glute, muscles, are important for a number of reasons: they help maintain posture, play an important role in reducing the risk of injury (underactive or weak glutes mean more strain on the back, hips and knees), and they help to balance the pelvic floor by keeping the pelvis in alignment.

Those hill walks will do a great job of getting your butt working, and here are a few exercises you can start doing right now to work on your glute strength. Click here to find out where to buy the minibands.

Kickbacks.

I love these because you’re standing up and on 1 leg, so it engages your core too. This exercise really focuses on making sure you get a good extension behind your body. So many runners just fall forwards from one leg to the other, rather than using their glutes to propel themselves forwards.

Side Steps.

These work the butt muscles at the side of the pelvis, so help to keep it stable when you’re on 1 leg. Having strong muscles on the outside of your hip helps to keep your knees in line and prevent injury.

1 Leg Miniband Squats.

A lot of people struggle to keep their knee in line when they stand on 1 leg and it moves inwards instead of staying in line with their toes. This is a corrective exercise where you use the band to pull on the working knee: the muscles on the outside of your hip have to work harder to fight this pull and keep your knee from moving in, thereby getting  better at doing this, even when the band isn’t there.

3. Breathing

How you breathe has a huge impact on your core and pelvic floor. I explain how in more detail here, but essentially your diaphragm (your main breathing muscle) and your pelvic floor work together, along with your core. If this system isn’t functioning properly you increase your risk of incontinence when you run.

A really important point here is to make sure you’re not tensing or pulling your tummy in while you run. It’s not always easy to do- when you’re working hard it’s difficult to stay relaxed. I see a lot of runners with tense shoulders, jaws or fists, and tummies can tense up too. This interferes with the natural movement of the core as you breathe and puts more pressure on your pelvic floor.

4. Alignment

This links to your breath- you need to keep your ribs over your pelvis so that your diaphragm and pelvic floor are in their strongest positions. ribs over pelvis

You also need to keep your pelvis in what’s called a neutral position. This means your bum shouldn’t be tucked under and your back flat (more about this here), but untucked so there’s a slight curve in your low back. If your bum is tucked under then your pelvic floor is left in a weak position and you’re at risk of- you’ve guessed it!- leaks. The butt exercises above will help with this too.

5. Reduce The Impact.

As with anything, build up slowly. Start with slow, short jogs or intervals, where you jog then walk, jog then walk. This gives your body time to adapt and get stronger, so you’re less likely to suffer the result of your pelvic floor giving way as a result of too much, too soon.

Other key things to bear in mind when planning your run:

Running surface.

Grass, gravel and sand will all reduce the impact on your joints and pelvic floor. Try to avoid alwasy running on the pavement.

Reduce your stride length.

A long stride will lead to a heavier landing on your heel, and more impact. Take smaller strides and land with your foot under your body, rather than out in front.

Avoid downhill running.

Downhill running tends to result in a heavier landing and more impact, so try to stick to flat surfaces, or walk down hills.

Vary your workouts.

Include other forms of exercise in your routine to give your body a break. Cycling and swimming are great pelvic floor safe cardiovascular workouts, and a good resistance programme will complement your running, as will yoga or pilates.

If you still feel you need help getting fit to run then personal training can help, giving you a programme to build up to running again, or to complement your existing running routine. If you’d just like a chat about where to go next with your training, or what help you might need, then get in touch here.

1

I’m sure you’ve all been told before how great squats are for the glutes, and while the humble squat is an awesome exerise, when it comes to getting buns of steel there’s more than one way to skin a cat, as they say. Here we’re going to show you a few alternatives to throw some variety into your workouts.

But first, a quick look at why the glutes are important.

Yes, there’s the aesthetics. But there’s more to the glutes than that. They help maintain posture, play an important role in reducing the risk of injury (underactive or weak glutes mean more strain on the back, hips and knees), and they help to balance the pelvic floor by keeping the pelvis in alignment. So extra relevent to the post natal woman!

There are actually 3 glute muscles.

Gluteus maximus, medius and minimus. Gluteus maximus works to extend the hip, which is when your thigh moves behind your body, and rotate it outwards.

e56a76_49a1c14035c74db199685703a44e59cd

Gluteus medius and minimus work together to abduct the thigh (pull it out to the side), and rotate it in. Gluteus minimus (2nd picture) sits underneath gluteus medius (side view in the top picture).

e56a76_49895a68396f41e68addb4b5433162c9

e56a76_2644d5d7ab134049bc66aaacf6411f44

Here are 3 great exercises that really hit these muscles!

The Glute Bridge:

Lateral Step:

Glute Bridge with Leg Extension:

The offers mentioned in the videos are valid until 30th April 2015. Terms and conditions apply, please contact me for more information or visit the personal training page.